Showing posts with label bread. Show all posts

Thursday, August 27, 2015

Make your own mixes!!

Hey there, friends!  With soccer season upon us (and my girls' ongoing theatrical studies!) I'm all about easy but REAL food.  My crockpot has been getting a workout as has my freezer.  To make it even simpler I thought I'd take some of our favorite recipes and turn them into mixes.

So here's what I did this morning:

See the mess on the counter?  This only happens once- when I make the mixes!  Another benefit of  using mixes.
For each recipe I measured out the dry ingredients and wrote what I'll need to add on the bag along with minimal instructions.  Here's a close up of each of the bags:

Still using Christmas bags!  Ho ho ho...


That's 4 White breads, 3 Banana breads, and 3 pancake batches.

The white bread is the Julia Child recipe I posted a few weeks ago.  Click on the link above.

Here's the banana bread recipe.  I've made it since my youngest was a baby.  It's from one of those community cookbooks in which cooks share their favorite recipes.  I've never met this "Barri Colman" but she rocks!  Thank you, Barri, wherever you are.  :)


The pancake recipe is from The King Arthur Flour Cookbook.  If you're looking for from-scratch recipes this would be a great addition to your cookbook collection!  

Note:  I halved the recipe and don't add the malted milk powder or vanilla.

Making your own mixes is really easy and saves time in the kitchen both in the cooking process and clean up.  You can do the same with your favorite recipes.  It took me less than 30 minutes, even with 2 little four-legged stinkers getting into mischief.

Let me know what you think in the comments below.  Feel free to share your recipes too.  I'd love it!!

Sarah

Friday, August 7, 2015

Julia Child's White Loaf, Baking With Julia, 1996


Baking bread is more of a winter activity for me because a hot oven on an already hot day is just too much.  (I'm a middle aged woman you know...)  But this bread is worth it.

This all started last weekend when hubby went to the store with me and put a loaf of bread into the cart.  It was that red package from my childhood with the cinnamon, raisins and the Sun Maid Raisin girl on the package.  We came home, made dinner and went on with our lives until I had a slice of that bread toasted.  With butter.  And it was gooooooood!  Feeling guilty I scanned the ingredients and felt even more guilty.  I saw too many chemicals to count and that dreaded high fructose corn syrup.  

Fast forward to today, laundry day.  What better way to procrastinate than making bread, right?  Besides the kids and I scarfed down hubby's pick when he was at work.  So...

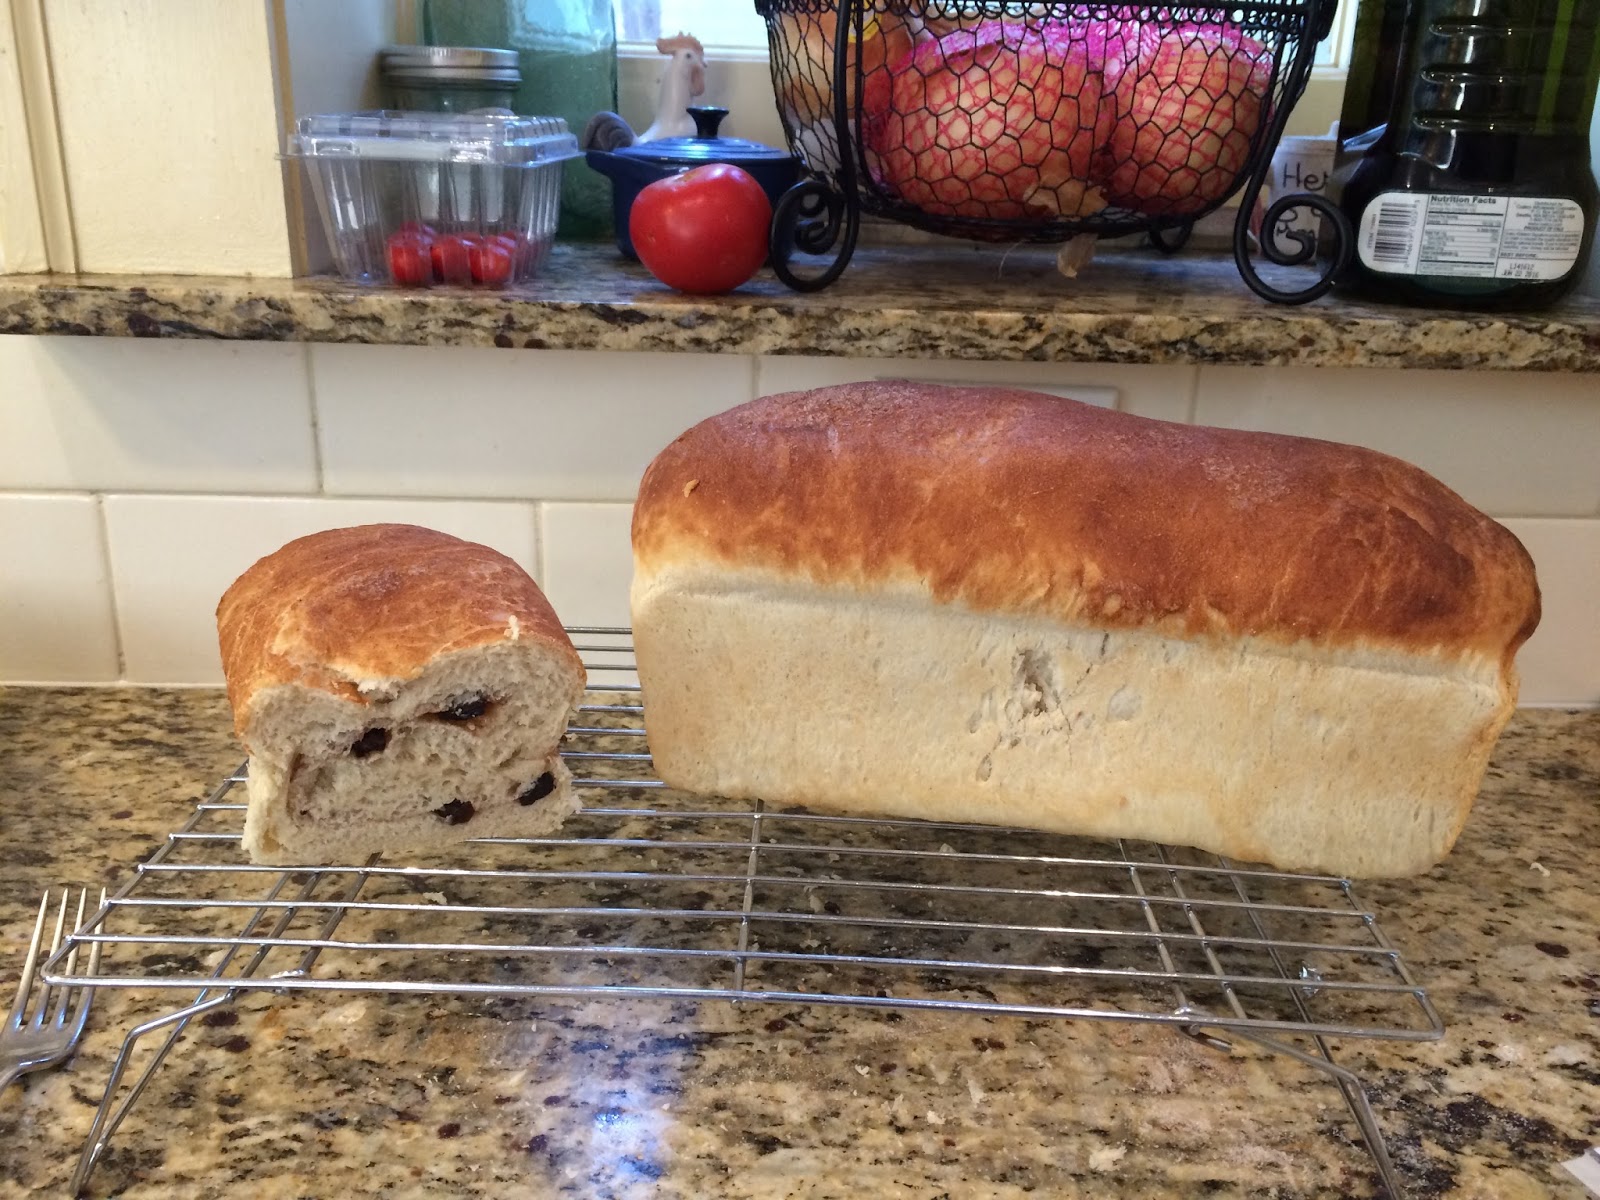
Here's the regular white bread, as the recipe was written.  


And here's the cinnamon raisin version.  Aka: A gift from above.


See there hubby and I had a taste?  We told the kids we needed to save some to bring to the new neighbors.   We don't have new neighbors...  This bread may bring out the worst in me.  Ha ha.

Here's the recipe:  

2 1/2 C Warm water, divided
1T Yeast (dry active)
1T Sugar
6-7 C All purpose flour
2t Salt  (Julia uses a whole tablespooon but this is too much for us)
1/4C Butter (half a stick or 4T), melted
Cinnamon sugar and small raisins to taste (optional)

Place a half a cup of warm water (It should feel like nice bath water- not burning hot but not tepid.) in a large mixing bowl or your mixer bowl.  Add the sugar and yeast.  Let sit for five minutes or so until it gets bubbly.  

Add the rest of the warm water, 3C of flour, the salt, and the melted butter.  Mix by hand or use the dough hook of your mixer.  Let the mixer run on a low speed adding a cup of flour at a time until the dough is elastic and smooth.   You may not use all 7 cups.  Bread is kind of like that.  If doing this without a mixer you'll need to take the dough out of the bowl and knead by hand adding the flour slowly as it gets incorporated into the dough.  

Cover the dough in the bowl with a dampened kitchen towel until it has doubled in size.  The time will vary depending on the weather and the temperature in your kitchen.  It usually takes about an hour.  

Punch the dough in the bowl.  Take it out and knead a few times by hand.  Bread trick from my grandmother:  If you leave the dough to rise too long just punch it down and let it rise again.   You'll know because it'll be HUGE and too airy. 

Split the dough using a knife or kitchen shears into two even balls.  (Or not as I did with my cinnamon raisin edition because one loaf was larger than the other.)  Pat out the dough and gently stretch until it is a a rectangle shape with the short side the same length as your pan.  (So using a traditional 4"X8" pan the short side should be about 8".)  Fold the dough into thirds starting with the short side, like you're folding an old fashioned business letter.  (Does anyone do that anymore?) Place the dough seam side down in your buttered or greased pan.  Please don't forget to grease your pan!!!!!!!!!  You will be sad if you do.  :(

If you're making cinnamon raisin bread sprinkle the top 2/3 of the dough with cinnamon sugar and soaked and dried raisins before folding.  (Julia goes into how to prep the raisins.  Basically you let them sit for about 10 minutes in hot water, drain, and dry really good.)  I didn't do this and the raisins are falling out all over the place.  But I'm cool with that.  Slathered butter solves this problem.  

Cover with the kitchen towel again for another hour or so.  When the loaves have doubled again preheat your oven to 375.  When it's ready place the loaves on a middle rack and bake 30 to 40 minutes.  You'll know it's done because the tops will be a beautiful golden brown and the house will smell like freshly baked bread.  

Take the loaves out of the pans and let cool on a wire rack.  The bottoms should sound hollow if tapped.  If not put them back in directly on the oven rack for another 5 minutes or so.  Julia goes into using a thermometer to check for doneness but I've never missed with the bottom tapping method.  

Here's the original recipe from the 1996 edition of Baking With Julia.  She's a bit wordier than me.  Go figure.  


The kids eventually got a taste so don't call the authorities.  They took a break from their busy summer activities (Video games when I let them, drawing when I don't, and puppy playtime any time the pups are awake.) and devoured the what was left of the little cinnamon raisin loaf, half of a plain one, and 3/4 of a stick of butter.  I hid the big raisin loaf in the freezer.  Julia says it freezes well for a month so this will be a special first day of school breakfast if no one finds it.  

Enjoy!

Sarah


Monday, February 17, 2014

Chopped Beef Potpourri, Woman's Day February 1949 and bonus recipe Speedy Artesian Bread

This recipe was originally published in a 1938 Women's Day issue.  It was part of an article called "Our Best 64 Hamburger Recipes".  That's a lotta beef!  Perfect for my carnivore hubby.  In 1949 this recipe costs only $0.14 to make.  Using the CPI Inflation calculator that's $1.37 in today's dollars.  Food prices sure have gone up independent from inflation because I spent way more that that!

Chopped Beef Potpourri is just ground beef stew.  It's a great all in one meal (Includes protein, veggies, grains, and starch.) to make on a weekend and there's enough for leftovers throughout the week.  Judging from the ingredients it would probably freeze well.  Warning:  total cooking time is 2 hours.  Plan accordingly.  ( I caught the end of Hairspray and about half of Grease while making dinner tonight.  Yes, I was in the kitchen a good looooong time!)  I also made an herbed artesian bread using a speedy version of my Aunt Alice's favorite bread recipe.  I'll post my fast recipe below but click on the link to see the original.  It's not vintage but it's a keeper.  Even if you've never made bread before you can make this recipe.  Really.

Here's the original Chopped Beef Potpourri:


Here's my version, aka Ground Beef Stew:

  • 1 Lb Ground Beef
  • 2 Large onions, sliced 
  • 1/3C Barley
  • 2 1/2C Diced tomatoes (about a can and a half using two 14.5 oz cans)
  • 1 1/2 Quarts water
  • 2 Beef bullion cubes
  • 1T Salt (or less depending on the saltiness of your bullion)
  • 1/2t pepper
  • 3 Carrots, sliced
  • 2 Large potatoes, diced
  • 3 Stalks celery, diced
  • 2t A-1 steak sauce
  • 1/2t Worcestershire sauce
  • Garlic powder to taste

First brown the ground beef in a BIG pot over a medium high heat.  Add the onions and cook for about 10 minutes lowering the heat if necessary to avoid burning them.  You'll see the original recipe calls for 3 onions.  Remember my whole thing about onion sizing?  How I'm betting they're larger now?  Well if not click on the "onion sizing" label on the right.  Here's how much onion I used:
The onions on a 9 inch salad plate.
Heat the water and add the two bullion cubes.  Dissolve completely and add to the beef and onions along with the barley, tomatoes, salt, and pepper.  Cover and simmer over a low to medium low heat for one hour.  (This is when I baked the bread.  I mixed up earlier so it had already risen.)

Add the veggies, sauces, and garlic powder.  Stir well and cover and simmer for another hour.  Here's what you get:

This was after dinner.  The pot was filled to the ring around the top.
About half was left.  Not sure why the color is off.  Probably the lighting.


I was lucky to have another helpful taster tonight as my son is having a friend sleep over.  These boys are such little men!  Both agreed that they loved the meat and the potatoes best.  When I asked them to describe the flavor they called it "meaty".  Hubby liked their description adding that he thought it would taste even better if I made meatballs to join the pound of ground beef already in the stew.  (I supposed then I could call it "caveman stew" which would be kind of funny like I'm Betty Rubble.  "Barney, your caveman stew is ready!!!")  One daughter didn't care for it but the other loved dipping the bread in the juice.  The puppy of course loved the little taste he got.  Here he is looking cute and hoping for more.

Focus on the doggie, not the stuff on the counter.
Cooking is messy.  At least in my kitchen.

Now on to the bread!  

Speedy Artesian Bread

3C Regular flour (NOT bread flour!)
2t Rapid rise yeast (1 heaping T of regular yeast can be substituted.)
1.5t Salt
1.5C Warm water

Seasonings:  I used about 2 tablespoons dried chives, a few shakes each- garlic powder, onion powder, and oregano and about 3 tablespoons of parmesan cheese.  Be creative and add what you like.  Start with a little and smell it to make sure your combo works for you.  Then add more if you feel like it. 

Use a large mixing bowl.  Put in the flour, yeast, salt, and seasonings if you're using them.  (This bread is awesome plain too!)  Mix well.  Add the water.  Mix really well, scraping as much of the flour off the sides of the bowl as you can.  Cover with plastic wrap and let rise.  Since it was cold today and my counters are on an outside wall I turned on the oven while I was mixing to warm up the room a bit.  Let rise for 3-4 hours.  (The regular recipe takes 12 hours to rise.)  The dough will be bigger, spongy and you'll see air bubbles when it's ready.  

Preheat your oven to 450.  When hot put in a heavy covered pot large enough to hold the dough when it rises even more.  I use a cast iron Le Creuset pot like this one.  (On a side note these are awesome and definitely worth the price.  My brother still has one of our mother's and he uses it all the time.  I plan on passing mine down to my kiddos.  Luckily I have a few different sizes, as I do kids!)  Leave the pot in the oven for 30 minutes so it's really hot.  While it's heating use a rubber spatula to loosen the dough from the bowl and pour it onto the center of a large piece of parchment paper.  Use the spatula to reshape if you wish or leave it how it falls.  Cover with the plastic wrap while you wait for the pot to heat.  

When the pot is hot carefully take it out of the oven using hot mitts.  (The term "hot mitts" comes from a night of wine and dinner in my not so big old kitchen with me, my friend Janet, our hubbies, and our collective 7 kids running through every so often.  I can't remember what the meal was but when I needed to take it out of the oven my middle aged fuzzy brain couldn't think of the words "oven mitts" and the term hot mitts was born.)  Remove the plastic wrap and carefully lower the dough loaded parchment paper into the pot.  Cover (And use your hot mitts please!!  The lid will be HOT.) and put in the oven for 30 minutes.  Uncover and bake another 10 to 15 minutes until brown and yummy looking like this:    

The left loaf is plain and the right is the herbed.  I used a square Le Creuset pot for the plain and my smallest round for the herbed.

Using your trusty hot mitts turn the pot over and let the bread fall out onto a cooling rack.  Remove the parchment paper and flip the loaf right side up.  Let cool before slicing.  A serrated knife cuts best.

Either version of the bread is delicious with/for soups, stews, grilled sandwiches, toast, etc.  My friend Lauren, who probably hasn't had bread in 10 years, tried a little that I brought over on her "cheat day" and she loved it.  She had it with smoked Gouda.  (I'm drooling just thinking about it.  My poor computer.) Full disclosure- Lauren has an awesome figure to match her awesome willpower.  I feel kind of bad I tempted her but the bread was really for her also awesome fiancĂ© Brad, who loved it too.  

I make the plain version of this bread weekly.  It's become our "house" bread.  I've searched for years to find a bread recipe my kids like to replace the store bought varieties.  This isn't soft like store bought though.  It works for us except for pb&j's.  So guess what?  The kids are eating less pb&j!  They practically lived on them for the first 7 years of their lives so I don't feel too bad.  

Sarah