Monday, February 17, 2014

Chopped Beef Potpourri, Woman's Day February 1949 and bonus recipe Speedy Artesian Bread

This recipe was originally published in a 1938 Women's Day issue.  It was part of an article called "Our Best 64 Hamburger Recipes".  That's a lotta beef!  Perfect for my carnivore hubby.  In 1949 this recipe costs only $0.14 to make.  Using the CPI Inflation calculator that's $1.37 in today's dollars.  Food prices sure have gone up independent from inflation because I spent way more that that!

Chopped Beef Potpourri is just ground beef stew.  It's a great all in one meal (Includes protein, veggies, grains, and starch.) to make on a weekend and there's enough for leftovers throughout the week.  Judging from the ingredients it would probably freeze well.  Warning:  total cooking time is 2 hours.  Plan accordingly.  ( I caught the end of Hairspray and about half of Grease while making dinner tonight.  Yes, I was in the kitchen a good looooong time!)  I also made an herbed artesian bread using a speedy version of my Aunt Alice's favorite bread recipe.  I'll post my fast recipe below but click on the link to see the original.  It's not vintage but it's a keeper.  Even if you've never made bread before you can make this recipe.  Really.

Here's the original Chopped Beef Potpourri:


Here's my version, aka Ground Beef Stew:

  • 1 Lb Ground Beef
  • 2 Large onions, sliced 
  • 1/3C Barley
  • 2 1/2C Diced tomatoes (about a can and a half using two 14.5 oz cans)
  • 1 1/2 Quarts water
  • 2 Beef bullion cubes
  • 1T Salt (or less depending on the saltiness of your bullion)
  • 1/2t pepper
  • 3 Carrots, sliced
  • 2 Large potatoes, diced
  • 3 Stalks celery, diced
  • 2t A-1 steak sauce
  • 1/2t Worcestershire sauce
  • Garlic powder to taste

First brown the ground beef in a BIG pot over a medium high heat.  Add the onions and cook for about 10 minutes lowering the heat if necessary to avoid burning them.  You'll see the original recipe calls for 3 onions.  Remember my whole thing about onion sizing?  How I'm betting they're larger now?  Well if not click on the "onion sizing" label on the right.  Here's how much onion I used:
The onions on a 9 inch salad plate.
Heat the water and add the two bullion cubes.  Dissolve completely and add to the beef and onions along with the barley, tomatoes, salt, and pepper.  Cover and simmer over a low to medium low heat for one hour.  (This is when I baked the bread.  I mixed up earlier so it had already risen.)

Add the veggies, sauces, and garlic powder.  Stir well and cover and simmer for another hour.  Here's what you get:

This was after dinner.  The pot was filled to the ring around the top.
About half was left.  Not sure why the color is off.  Probably the lighting.


I was lucky to have another helpful taster tonight as my son is having a friend sleep over.  These boys are such little men!  Both agreed that they loved the meat and the potatoes best.  When I asked them to describe the flavor they called it "meaty".  Hubby liked their description adding that he thought it would taste even better if I made meatballs to join the pound of ground beef already in the stew.  (I supposed then I could call it "caveman stew" which would be kind of funny like I'm Betty Rubble.  "Barney, your caveman stew is ready!!!")  One daughter didn't care for it but the other loved dipping the bread in the juice.  The puppy of course loved the little taste he got.  Here he is looking cute and hoping for more.

Focus on the doggie, not the stuff on the counter.
Cooking is messy.  At least in my kitchen.

Now on to the bread!  

Speedy Artesian Bread

3C Regular flour (NOT bread flour!)
2t Rapid rise yeast (1 heaping T of regular yeast can be substituted.)
1.5t Salt
1.5C Warm water

Seasonings:  I used about 2 tablespoons dried chives, a few shakes each- garlic powder, onion powder, and oregano and about 3 tablespoons of parmesan cheese.  Be creative and add what you like.  Start with a little and smell it to make sure your combo works for you.  Then add more if you feel like it. 

Use a large mixing bowl.  Put in the flour, yeast, salt, and seasonings if you're using them.  (This bread is awesome plain too!)  Mix well.  Add the water.  Mix really well, scraping as much of the flour off the sides of the bowl as you can.  Cover with plastic wrap and let rise.  Since it was cold today and my counters are on an outside wall I turned on the oven while I was mixing to warm up the room a bit.  Let rise for 3-4 hours.  (The regular recipe takes 12 hours to rise.)  The dough will be bigger, spongy and you'll see air bubbles when it's ready.  

Preheat your oven to 450.  When hot put in a heavy covered pot large enough to hold the dough when it rises even more.  I use a cast iron Le Creuset pot like this one.  (On a side note these are awesome and definitely worth the price.  My brother still has one of our mother's and he uses it all the time.  I plan on passing mine down to my kiddos.  Luckily I have a few different sizes, as I do kids!)  Leave the pot in the oven for 30 minutes so it's really hot.  While it's heating use a rubber spatula to loosen the dough from the bowl and pour it onto the center of a large piece of parchment paper.  Use the spatula to reshape if you wish or leave it how it falls.  Cover with the plastic wrap while you wait for the pot to heat.  

When the pot is hot carefully take it out of the oven using hot mitts.  (The term "hot mitts" comes from a night of wine and dinner in my not so big old kitchen with me, my friend Janet, our hubbies, and our collective 7 kids running through every so often.  I can't remember what the meal was but when I needed to take it out of the oven my middle aged fuzzy brain couldn't think of the words "oven mitts" and the term hot mitts was born.)  Remove the plastic wrap and carefully lower the dough loaded parchment paper into the pot.  Cover (And use your hot mitts please!!  The lid will be HOT.) and put in the oven for 30 minutes.  Uncover and bake another 10 to 15 minutes until brown and yummy looking like this:    

The left loaf is plain and the right is the herbed.  I used a square Le Creuset pot for the plain and my smallest round for the herbed.

Using your trusty hot mitts turn the pot over and let the bread fall out onto a cooling rack.  Remove the parchment paper and flip the loaf right side up.  Let cool before slicing.  A serrated knife cuts best.

Either version of the bread is delicious with/for soups, stews, grilled sandwiches, toast, etc.  My friend Lauren, who probably hasn't had bread in 10 years, tried a little that I brought over on her "cheat day" and she loved it.  She had it with smoked Gouda.  (I'm drooling just thinking about it.  My poor computer.) Full disclosure- Lauren has an awesome figure to match her awesome willpower.  I feel kind of bad I tempted her but the bread was really for her also awesome fiancé Brad, who loved it too.  

I make the plain version of this bread weekly.  It's become our "house" bread.  I've searched for years to find a bread recipe my kids like to replace the store bought varieties.  This isn't soft like store bought though.  It works for us except for pb&j's.  So guess what?  The kids are eating less pb&j!  They practically lived on them for the first 7 years of their lives so I don't feel too bad.  

Sarah


Thursday, February 13, 2014

We're in quarantine! (Well not really but it feels that way.)


Sorry no tested recipe this week.  We've all been sick with this bad bug that is lingering in my house like it's immune to Lysol, which has been sprayed sufficiently on all surfaces except the dog.  (Since we all cuddle with him it was suggested by an unnamed family member but I used my mommy clout to protect him from the fumes and the humiliation.)  The scene at my house was quite less charming than the picture above but I thought it was cute with the brother dressed up like a doctor nonetheless.

Since tomorrow is Valentine's Day I wanted at least share something pink, red and heart shaped.


How sweet!

Click to see recipe.  
Notice my little guy's fingers helping me hold the page flat?  Just got home from the doctor and I put him to work!  I promised him Valentine pancakes for breakfast tomorrow to return the favor.  We'll see how we all feel.  I hope he doesn't have to miss his class Valentine's party!  :(

The rest of the recipe.

I hope everyone is well and out enjoying winter like this happy girl!

The magazine is a bit worn but I love the picture!
Sarah

Wednesday, February 5, 2014

Chicken and Rice, Family Circle February 1955

This recipe is called "Arroz Con Pollo" in the February 1955 issue of Family Circle.  It literally means "rice with chicken" in Spanish.  The popular dish is so much a part of the culture that most Latin countries have their own version.  Since this recipe is so Americanized I opted to just call it Chicken with Rice.  (Why switch the order?  There's clearly more chicken than rice in the recipe.  I assume the Latin versions have more rice as the traditional Latin diet is more grained based.  Here in America we're all about protein, aren't we?  Not sure that's a good thing.)

This dish takes a few steps (and a good can opener) but it's easy enough for a weeknight.  With a little planning I could do the bulk of the prep it in the afternoon and do the rest in between schlepping kids to and fro.  It was nice comfort food on a lazy Sunday.


Here is the original recipe.  It starts in the lower left column and continues on the upper right.

Here's what I did:
  • 1 Chicken, cut in 8 pieces
  • 2T Olive oil (Original recipe called for 1/4C.  2T is plenty.)
  • 1C Raw white rice
  • 1C Chopped onion
  • 2 Cloves garlic, minced
  • 1-14.5oz Can of green beans
  • 2-14.5oz Cans of diced tomatoes
  • 1-6oz Can of chopped mushrooms (I didn't use the whole jar- aimed for 4 ounces)
  • 1-4oz Jar of diced pimientos (What are pimientos?  Click here to find out!  I know them from the pimiento cheese of my Texas childhood but had no idea they were actually peppers.  Go figure.)
  • 2T Dried parsley
  • 1.5t Salt (Or salt to taste.  It depends on how salty your canned veggies are.)
  • Dash of pepper
  • .5t Chicken bullion granules

Warm 1T olive oil in a large skillet over a medium high heat.  Sprinkle the chicken pieces with salt and pepper.  Add the chicken and turn to brown on all sides.  Place the browned chicken in a large baking dish.  Preheat oven to 350.

Add the remaining 1T of olive oil to the skillet.  Add rice and sauté over a medium low heat scraping brown bits on the bottom of the pan.  Add onions and garlic.  Sauté for about 10 minutes until soft.

(Hold the phone!  This is where it gets really vintage...)

Drain liquid from the can of green beans into a measuring cup.  Add water to make 1 cup total.  Pour in skillet with rice mixture.

(...Explanation:  Reserving the water in canned veggies or the cooking water from steamed fresh veggies was just what people did as a matter of course back in the day.  Somewhere along the line we stopped saving this nutrient dense water to use in soups or other dishes and it just went down the drain.  When I read this in Michael Pollan's book Food Rules I promised to start a veggie water jar in the fridge.  Never happened.)

Stir into the skillet:  green beans, tomatoes with liquid, mushrooms with liquid, pimientos, parsley, salt, pepper and bullion granules.  Bring to a boil.  Spoon over the chicken in the baking dish.  Cover and bake for 50 minutes.  Uncover, dig out the chicken, rest it on top of the rice and bake for another 10 minutes.

Voila!  This is what you get:

Chicken, rice and veggies all in one dish.  How easy!  We had fruit on the table to round out the meal.

When I first saw this recipe I was concerned about all the canned veggies.  I mean fresh is best, right?  And then next comes frozen?  For goodness sake my mother was a back to the Earth hippie vegetarian in a housewife's clothing!  How can I make a meal based on canned vegetables?  Then I thought about what my doctor told me once.  When determining what is better nutritionally you have to look at the whole picture.  What else is available?  How much time do you have?  What do you like?  So if you're going to try to make this meal with fresh veggies (adding in time for the cleaning, trimming, chopping, and steaming) but end up with a house full of screaming hungry kids and a grumpy hubby who gives up and orders a pizza then the canned veggies are better.  My wise friend Janet agreed and I proceeded sans guilt.

The result-  I don't know if it was the extra salt and pepper I used before browning the chicken or my brilliant idea to add the chicken bullion granules but hubby said IT HAD FLAVOR!  (Cue the angels.)  The kids loved it too.  I cut the chicken off the bone for the bone phobic of my brood and they ate it right up.  I thought it was delicious.  The leftovers were yummy the next day and the rice didn't get mushy as I thought it might.  Winner Winner Chicken Dinner!!!

This is the beautiful Family Circle magazine cover.  I love it!

See George Washington?  Back then he didn't have to share his birthday by honoring all the presidents!  

I hope your family loves this dish as much as we did!

Sarah


Saturday, January 25, 2014

Bonus Post! How to cook vegetables the easy way

Sometimes when I'm making a delicious vintage recipe I run out of time to make real side dishes so I have a few "go to" favorites.  These aren't really recipes- just a little bit of this and a little bit of that.  You experienced cooks out there know this already but I wanted to share for those just starting out.

You can pretty much take any veggie/veggie combination and either steam, sauté, or roast it.

Steaming is cooking by moist heat.  To do this simply put cleaned, cut and trimmed fresh veggies into a pot or pan with a little water.  Cover, bring to a boil, and heat on medium low until soft.  You can also do this in the microwave.  If you choose to steam in the microwave I suggest using a glass topped container or a bowl and use a glass plate to cover.  (Thanks to my good friend Janet for this tip.  There is contradicting information about heating plastics and plastic wrap in the microwave so I avoid it.  Your choice though.  Janet and I are sticking to the plate method!)  Steaming works well for hard root veggies (like carrots, beets or potatoes) as well as for thin leafy greens (like cabbage, kale, and spinach) and flowering veggies (such as broccoli and cauliflower).    Corn on the cob and artichokes are also good steamed.  When steaming it's important to trim the veggies so that they are relatively uniform in size and remove the thick stems of leafy greens so that the veggies finish cooking at the same time.  (Nothing like picking out the soft carrots so they don't overcook while the hard ones finish.  This is especially annoying because a) they're really hot, b) the dog- aka my fourth child-  loves carrots and will often jostle up next to me, put his paws and head on the counter to try and grab a piece when I'm not looking, and c) if poochie is successful he burns his little mouth and I have attend to him rather than finishing this quick side dish.  Considering this scenario I just cut the dang veggies uniformly!)

Yummy microwaved steamed carrots with leftover chicken.


When it comes to seasoning I keep it simple.  First drain the veggies.  Then add a little olive oil or butter.  Yes, I'm talking about FAT!!  Fat soluable vitamins need fat to be absorbed.  Don't deny your body these nutrients!  If you're cutting the fat in your diet and are having it in another form in the same meal it's ok to skip it.  (But artificial fats and trans fats cause more harm than good so those don't count.  The natural fat in meats work.  Store bought cheese filled chicken nuggets with a side of  Oreos doesn't.)  The fat adds flavor so only omit if you must.  Then sprinkle the veggies with a little salt and pepper.  That's it.  The natural flavor of the veggies are enhanced without being overpowered.  If you need more flavor, like a special husband I know, then feel free to add other herbs.  Oregano or garlic are pretty good on most veggies.  Experiment and see what you like.


Sauteing
is cooking over a high heat while stirring the food frequently.  It's not as time consuming as it sounds.  Just trim, cut and wash your fresh veggies, heat a little olive oil (about the diameter of a quarter or half dollar) in a pan and cook over a medium heat.  (Frozen veggies are easier with no washing and trimming needed.)  Stir every so often.  Good veggies for sauteing are leafy greens, mushrooms, zucchini, onions, Brussels sprouts and thinly sliced potatoes.  (Potatoes will fall apart but taste great.)  A combination of these is delicious too.  Just put the harder solid veggies into the pan to cook first.  Again, uniform trimming is a good idea.

To season do the same as steaming.  No draining though and you probably don't need to add more oil.  A little butter can be added for flavor but it's not necessary.

Spinach with onions.  I sautéed the onions, added the spinach, then covered to steam without water.  Used fresh onions and frozen spinach, which has enough water already.


Roasting fresh veggies is like putting dinner on auto-pilot.  Just pop the veggies in a preheated 350 degree oven and walk away for an hour.  Or in my case walk to the laundry room and fold laundry.  (Or clean the remnants of a lollipop from a sweatshirt fresh out of the dryer.  Or sew on a button.  Or take out the miss matched sock basket and play memory.  My options are endless!)   Again you'll have to wash, trim and cut the veggies uniformly.  Put them in a baking dish or jelly roll pan (It's a baking sheet with sides- you don't want run away veggies roasting on the floor of your oven believe me.) and drizzle with olive oil. If you want to add herbs do so before roasting.  (Same suggestions as when steaming veggies.)  Save salt and pepper for afterwards.  The salt dehydrates.  Since the salt and pepper go together I just add it before serving too. Veggies conducive to roasting are those yummy root veggies, onions and other alliums like shallots and garlic cut thick or left whole, beets, turnips, kohlrabi, and most veggies I find in my CSA box but don't know what to do with.    (Or what they are!)  Winter squash works well too but as I'm not a big fan I'll leave that to others who really know what to do with it.  Just google "roasting squash".

Roasting takes time but I consider it a quick side dish because the hands on time is minimal.  With a little planning it I can make roasted vegetables even on a busy weeknight.  For example this week I left the veggies roasting in the oven and took my little miss- daughter aged 13- to a parent meeting for one of her after school activities.  My oldest, who was home studying for finals, turned off the oven when the timer rang.  She left the oven door open a crack as I had asked her and it was all good.  (She's much better with this than cutting chicken on the bone.  Go figure...)  If you use this method I suggest getting a portable timer (not the one on your oven) and placing it in the room with the designated oven monitor.  "But I didn't hear the timer..." is not a good situation to come home to.

Roasted carrots, potatoes, onions and the leftover orange peppers from my son's school snack this week.  The pepper slices were added after the first 30 minutes so they didn't overcook.  

I prefer fresh veggies but sometimes my family wants something that's not in season.  Canned or frozen vegetables are a good option.  I try to buy only brands who use BPA free cans whose vegetables are organic.  (I know some of you out there may disagree but I think the anti-organic sentiment is based more on politics than fact.  I've just read too much to believe otherwise.  This is a good place to start if you want to explore the subject for yourself.)  As far as I know frozen vegetables' packaging doesn't pose a health risk but I never heat them in the bag.  Best part of buying canned or frozen?  No washing, trimming and uniformly cutting!  Frozen and canned veggies do best when steamed or sautéed.

These are the basic cooked veggies I serve regularly.  When my days are too busy for one of these options I simply cut up some carrots, celery and/or red peppers and call it a crudite plate.  Sounds a lot more interesting than raw veggies on a plate, right?  Ranch dressing makes it more special but my family eats the veggies nakie too.  (Just the clarify the veggies are nakie- not the hubby and kids.)  I've also been known to take out a container of pre-washed lettuce and make a salad bar with a leftover crudite plate found in the fridge.

Now before you think, "OMG!!  Sarah's family is so wholesome!  We'll she makes all those wonderful veggies...  It's no wonder they love them.  And even NAKIE without dressing!' just don't!  I eat 75% of the vegetables in this house.  When I refer to my family as "eating" or "wanting" certain veggies I'm honoring their wishes in an attempt to get them down the hatch.  It's no easier for me than any other parent (or wife) out there.  I just blab on and on about it more than most.

I hope my ideas and instructions simplify your meal preparation.  Let me know what you think in the comments below!

Sarah

Saturday, January 18, 2014

Chili Bake, American Home, January 1954

I've never seen this magazine, American Home.   From what I can find on the internet it ran from 1928 to 1977 and then merged with Redbook magazine, which is still around.


Apparently in the 70's the magazine changed direction and was written for "newly liberated women".   But my 1954 copy it is clearly marketed to the pre-Women's Lib housewife. Beautiful gardens are pictured as are family friendly dens.  Ads for cleaning products use cute babies as motivation for keeping a clean home while another promises the "carpeting of your dreams."  Of course many liberated women appreciate the importance of a germ free environment and dreamy carpeting but the ads are written in such a way that assume a woman is only concerned with home and family.  I'm a sucker for idealism of post war advertising nonetheless.

Now the recipe!

Chili bake is an easy mixture of ground beef, tomatoes, rice, cheese and seasonings.  Presto- all 4 food groups!  It was simple enough for a busy week night and the leftovers were good.  I didn't try freezing it (not enough for another meal) but I think it would do ok.

Preheat oven to 375.

1 No. 2 can of Tomatoes (2 1/2 C)
1lb Ground Beef
1C Chopped Onion
1t Salt
1/8t Pepper
2C Cooked Rice (White I assumed.  But brown would be good too.)
2t Chili Powder
1t Paprika
1C Shredded Cheddar Cheese

Brown the meat in a large pot or really large skillet over a medium heat.  Drain and set aside.  Cook the onions until soft.  Turn off the heat.  Put the beef back in pot/skillet with the onions and add the seasonings, tomatoes, rice, and 1/2C of the cheese.  Spread the mixture in a greased baking dish and top with the remaining cheese.

Bake for 20 minutes.

This is a great way to use up leftover rice and it would make the preparation even simpler.  You could also use precooked frozen rice.  Or leftover white rice from Chinese take out.  Having none of these options in the house I made the rice while I browned the beef and cooked the onions.  Didn't take much more time but added another pot to wash.  I much prefer cooking to cleaning!

Here's the original.  Can you spot the mistake?

Click on the image to see larger.

The recipe never says to mix in the tomatoes!  I'm surprised this was never caught in the editing phase of publication.  Go figure.  So I took it upon myself to add it.  I also used a half cup less cheese and cooked the beef and onion separately.  These are the only changes I made.  I served it with green beans and oranges (but not together).  Everyone was happy.  Most of all me.  :)

Here's the dish just seconds after coming out of the oven.


  I baked it in my vintage Hall baking dish.  (My aunt, who is a collector, said this was quite a find as she chastised me for putting it in the dishwasher.  I've been better about washing it by hand I promise, Aunt A.)   My family gave this dish the thumbs up but added their own opinions of course.  One of the girls didn't like the cheese on top but her brother loved it so he rescued the abandoned cheese from his sister's plate.  My other daughter said the cheese was just right.  (I'm living with the three little bears.)  Hubby came home starving and had two extra helpings.  I had to cut him off so I could save a bit to test as leftovers.  He said it could have used more onions but liked it and said it had enough "flavor."  I'll take that as a victory.  

I hope you enjoy it as much as we did!

Sarah

Tuesday, January 14, 2014

Bonus post! The New "1400" Diet, Women's Day January 1954

This is the cover of the January 1954 issue of Women's Day magazine.


It's straightforward.  A woman in a flattering and sensible ensemble surrounded by delicious looking homemade meals.  (Meals as big as our sensible lady it seems.)  No modern day celebrities flaunting their new "hot beach bods" and no trashy (yet tempting in a train wreck sort of way)  stories about the pictured celeb's secret wedding/surprise pregnancy/rumored break up/botched plastic surgery/$10,000 shopping spree.  Inside this magazine the only celebrities are in ads selling soap, toothpaste and lipstick.   Things were a lot more quaint in 1954.

The article begins with Mrs. Mary Evelyn Dempsey, a 46 year old housewife, weighing over 200 pounds at 5'0".  Her motivation for losing weight was to ease her aches and pains and be able to take care of herself.  She says that her husband and children had to take care of her "as they would a much older person." In fact someone once mistook Mr. Dempsey, who is a bit older, for her son.   If that's not motivation enough the article includes the now well known Metropolitan Insurance Company weight tables.


According to this chart Mrs D, wearing 2 inch heels and assuming she has a large frame,  should weigh 124-135 pounds.

I don't know if Mrs. Mary Evelyn Dempsey really exists but it doesn't matter so much.  She could be a composite typical of middle aged women with whacked out hormones and thick middles.  She represents the struggle we all feel to make healthy choices in a world of readily available nutritionally void junk.  Granted there was less junk food back then but the premise remains the same.  If you eat too much your body turns the extra food into fat.  And if you're a middle aged woman your metabolism slows down and you don't need a lot of food to keep it going.  Frustrating?  Yes.  But that's just the way it is.  Sorry.

Anyway, back to our dear Mrs. D.   Mrs. Dempsey's doctor refers her to Cornell University's experimental clinic where she partakes in a 1400 calorie a day diet developed by Dr. Margaret A. Ohlson of Michigan State College.  (This is before Michigan State is a university.)   She is referred based on the diagnosis of "obesity", a term she hates.  Doesn't everyone?

I have not tried this diet myself but on the surface I like it because it's based on real food.  No "diet foods" or eliminating any food group, except sweets.  Also it allows for limited full fat foods to keep the dieter fuller longer and meat for the same reason.  Vegetables are divided into 2 categories so the more nutritional veggies are eaten more often.  Fruits are allowed twice a day and one must be citrus.  It's just so simple.  No trying to make cookies out of hand milled almond flour and flax seed egg substitute.  It sounds a lot like the Weight Watchers plan I remember from the late 1970's, before they wanted to sell you boxes of chemical tasting GMO filled diet "food" before every meeting.  Here are the details:


There aren't any recipes except for salad dressing, jellied tomato juice (gag!), and cafe au lait.  (This is the pre-Starbucks era.  One must improvise. )  Meat, fish and poultry may be "roasted, broiled, simmered, stewed, steamed, or pan-broiled with no flour or fat except 1/2 teaspoon fat for liver, chicken, or fish."  (Personally I think if one is eating liver 4 tablespoons of butter should be allowed.  I'm clearly not a liver lover.  Apologies to those of you who are.)  The directions go on to say that it is not necessary to remove the fat from meat.  Nothing is noted regarding chicken skin.  This is before the days of boneless and skinless so I'm assuming it stays on and that dark meat is allowed.  (Par-tay, Mrs. D!!)  More notes are given.  Click on the pic for details.  I love the simplicity of the diet.  It assumes the dieter knows how to cook.  And again, there's nothing to buy except food.  Real food.  The 4 weeks of daily menus even make use of leftovers.  So you eat less and save food for another meal.    How 1950's is that?

Here are some typical meals on the diet:


Mrs. Dempsey lost 69 pounds and is thrilled to buy stockings in "regulars" versus the "outsized" she purchased prior to the diet.  She still looks a bit matronly but she's a lady of her time I suppose.  The article didn't say if Mrs. Dempsey kept the weight off longterm but she says her appetite changed.  She occasionally has dessert but not regular treats every morning with the ladies in the neighborhood.  Instead Mrs. Dempsey has her cafe au lait at their morning visits.    I'd like to think Mrs. Dempsey kept her weight off and died happy and fulfilled and at her goal weight of 135.  There's also the chance she's alive and kicking at age 106 drinking her cafe au lait.  In either case I appreciate her sharing her story.

Here's to you, Mrs. Dempsey!


Sarah


Mrs. Mary Evelyn Dempsey:  Before (right)  and after (left, looking in mirror).


Tuesday, January 7, 2014

Recipe two-fer: Bacon-Corn Casserole and Baked Apple Wedges, Woman's Day January 1952

Happy New Year, my dear readers!  My January 1952 Woman's Day magazine has this adorable baby on the cover:

Can you imagine receiving this magazine in the mail?  I much prefer it to the celebrity covered magazines of today!
I made two recipes from this issue.  The first is a Bacon-Corn Casserole.  Hubby and I feel like we're in a dinner rut so we were up for trying something really different.  I also love the idea of casseroles.  I suppose it's my gravitation towards decades past.  To me "casserole" congers up images of vintage kitchens with happy families gathered around the table.  Complete meals with side dishes, dessert, a table with full place settings... I could go on but I won't.

Here's the original:

See in about the middle of the blurb it says "•To make corn casserole".

This recipe is part of an article called, "Let dinner cook by itself" in which four meals, including a main dish with sides and a dessert,  are cooked in the oven at the same temperature and for the same amount of time.  These oven dinners touted meal simplification for "career-girls" and "busy homemakers".  Heat and eat frozen meals (ie: TV dinners) wouldn't be a part of our culture until 1954  so a plan such as this, even with at least 15-20 minutes of prep time and 25-90 minutes of unattended cooking time, was heaven for the busy lady of the house.  The article promises and "end to pot watching and frantic timing".  Sounds good to me!

Here's my version:

Preheat oven to 425.

1/2 LB Bacon
2 & 1/2 C Whole kernel canned corn, drained
2 & 1/2 C Creamed style corn
1 Egg, well beaten
2T Parsley, chopped
1t Salt
A few shakes of pepper

Chop bacon into small pieces, reserving 3 slices.  Cook pieces in a medium size pot over a medium heat.  Stir until brown.  Turn off the stove.  Drain excess bacon grease in pot but don't blot bacon.  Add both types of corn to the pot along with egg, parsley, salt, and pepper.  Mix well.  Divide into 4-5 individual oven compatible dishes.  Top with remaining bacon strips.  Bake in oven for 35 minutes.

The result:


Everyone liked it well enough.  But no one loved it.  The general consensus was that this casserole would be better as a side dish.  It was very rich and would be balanced perfectly by a simple grilled chicken.  My motivation for trying this recipe was to reduce the amount of meat we eat on a weekly basis.  Going meatless one night a week put my family into a panic so I thought I could try a new "less meat" dish.  Successful less meat meals for us are canned tuna on a green salad and breakfast for dinner with from scratch pancakes, scrambled eggs or bacon, and fruit.  I was hoping to add the Bacon-Corn Casserole to the rotation.

The recipe made more than enough for 4 meals.  As a side dish it could probably serve 8.  I would make it in a 9 X 12 glass baking dish.  I think a 8 X 8 would be too small.  It may freeze ok but I didn't try it.

Another oven dinner in this article had this recipe for Baked Apple Wedges:

The recipe is the last in this blurb where it says, " • For dessert".

This is so simple you really don't need a recipe but it was there:

4 Cooking apples, cored and sliced in wedges
1/3 C sugar
1/4t Cinnamon
Butter to taste

Mix the sugar and cinnamon.  Place apples in a greased shallow baking dish.  Sprinkle liberally with cinnamon-sugar mixture.  Dot with butter.  Cover and bake in your preheated oven with the Bacon Corn Casserole for about 20 minutes.  Remove foil and reduce temp to 350.  Bake another 10 minutes. (If making this without the casserole just bake at 375 for 40 minutes, uncovering after the first 20 minutes of baking time.)

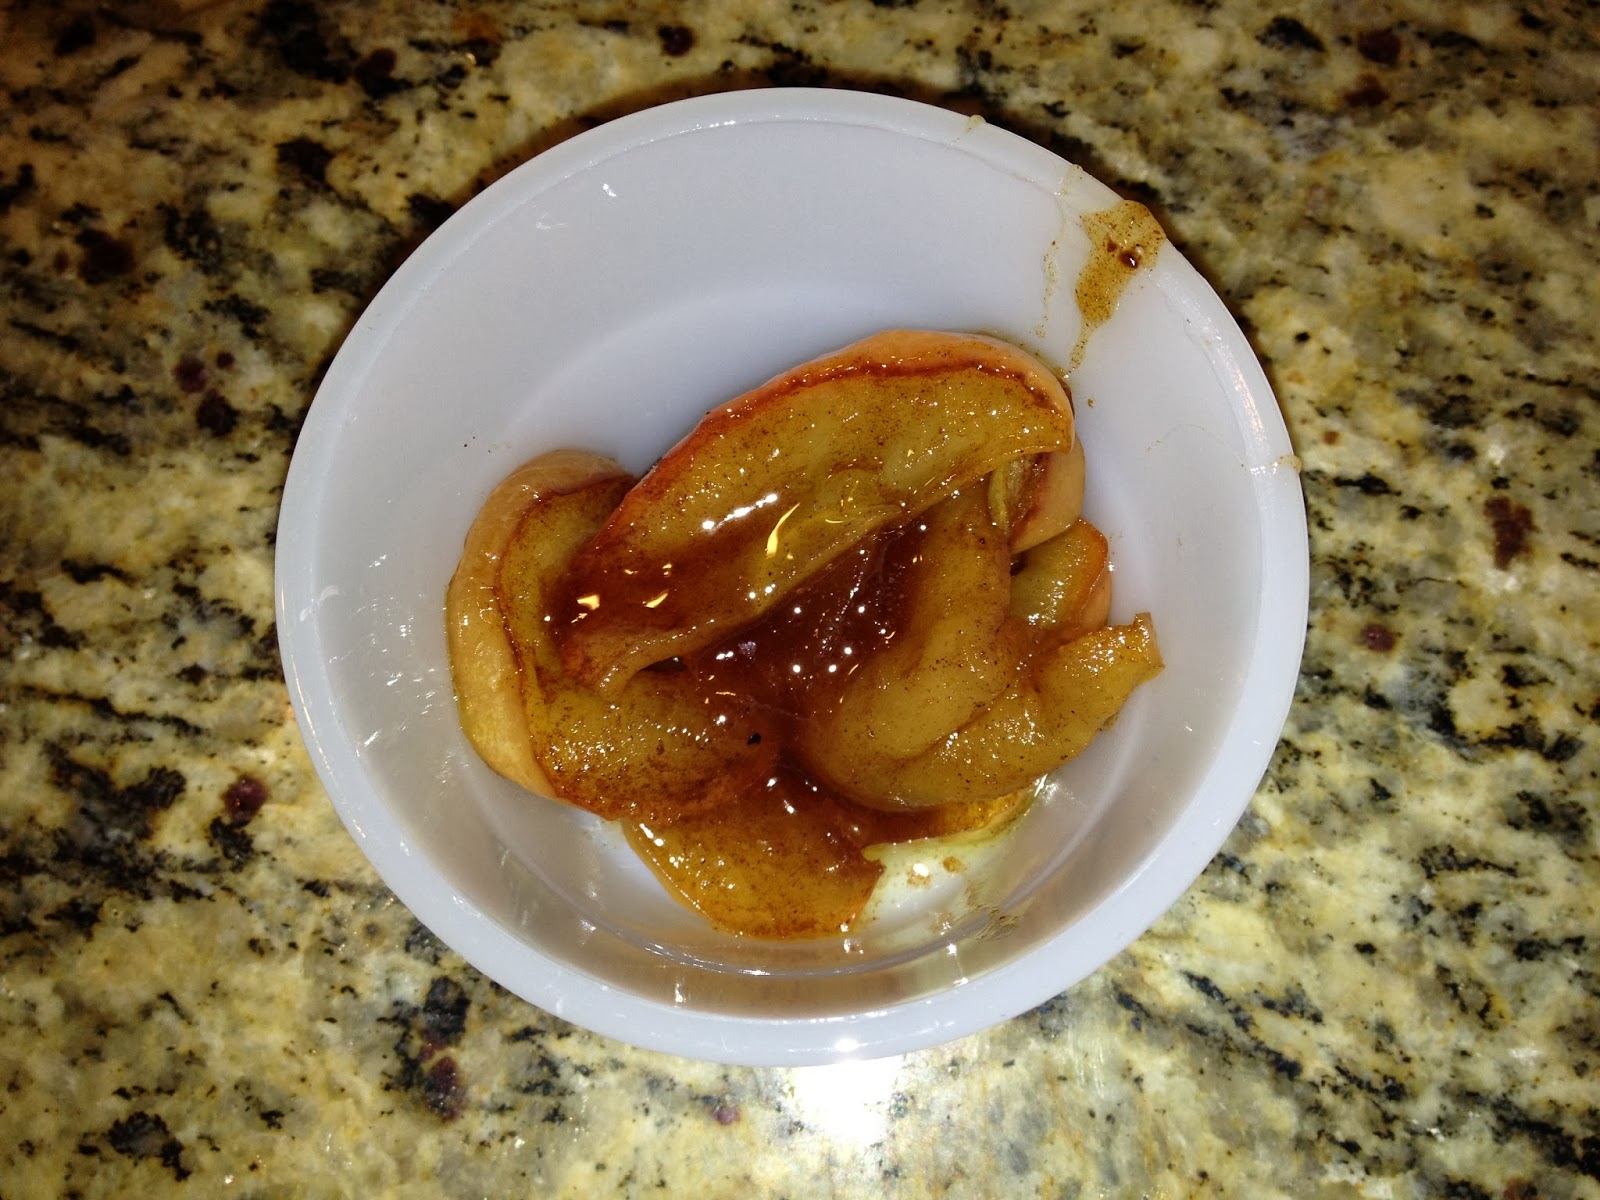
This was the best part of the meal.  I barely got to take a picture!

Can you just imagine all its gooey yumminess?!!?

This is basically apple pie filling so you can serve it like a crustless apple pie with vanilla ice cream or top with toasted pecans.  Or turn it into a crumple by topping it with an oatmeal/flour/sugar/butter mixture when you take off the foil for the last 20 minutes of baking.  You can also adjust the amount of butter and sugar to your liking.  It's nice to have warm fruit deserts in the winter because we get so tired of eating the fruits available in the winter.

Other notes:

The Bacon-Corn Casserole calls for "Number 2" cans of corn.  This is a no longer used measurement of canned contents that equals about 2 & 1/2 cups.  Ironically a "Number 2-1/2" can holds about 3 & 1/2 cups.  Go figure.  I can see why this system is no longer used.  It may have originally corresponded to the types of canning jars used in home canning back in the day.  (If any of you readers out there are canners please let me know in the comments below.  I'd love to hear from you.)  I found the can size to cups conversion chart in the front cover of my 1950 copy of the Betty Crocker's Picture Cook Book.  If you ever see one of these at an estate/garage sale snatch it up!  It's full of very interesting information in addition to some great vintage recipes!  Here's a pic of the conversion chart for your reference:

Love the term "picnic" can!  (Second from the top.)

I hope everyone is safe and warm in this arctic winter we're having, at least here in the US.  My kids were supposed to go back to school today after the winter break but classes were cancelled and are again tomorrow.  We had an electronic free afternoon and watched a movie, played a game, and had popcorn.  It was all good for about two hours.  And then it wasn't...

Sarah